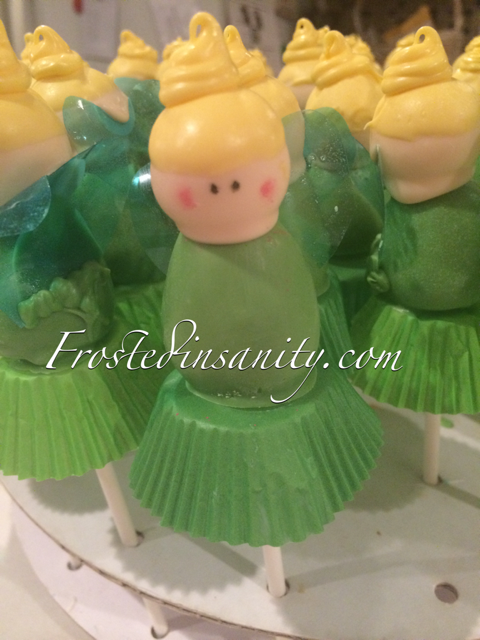
This cakepop is complicated because there are several steps that must be taken to get to the final product, but I think you'll find that it's worth it in the end.
Step 1: Make wings. These wings are made out of gelatin sheets, cut into 1.5" hearts.
To make gelatin sheets:
1TBP. unflavored gelatin
2 1/2 TBSP cool water
Pour the water into a microwaveable bowl, sprinkle the gelatin over the water -- avoiding lumps of gelatin.
Mix gently and let sit for 5 minutes
Microwave 10-20 seconds or until the gelatin is a clear liquid. Add a few drops of flavoring (I used bublegum!) and a drop of blue food coloring. Mix thoroughly.
Paint the liquid onto a sheet of velum or plastic (I use clean sheet protectors). Spread it very thin, then pick up the sheet by the corners and let the excess gelatin drip off the plastic sheet. Reheat the liquid if it starts to set up.
Allow the gelatin to dry overnight, the edges of the plastic sheeting may curl, this won't affect the end result, but you can tape or weigh down the edges if you would like the sheets to stay flat.
Once dry, peel the plastic sheeting off, and cut 1.5" hearts out of the sheets using food scissors. I just free-handed these. Don't worry if yours are a little lop-sided, it just adds character.
Step 2: Cake Pops
Using your favorite flavor of cake, bake, cool and crumble the cake and add frosting until the mixture resembles a firm cookie dough - start adding 1-2 tbsp. of frosting at a time to the crumbled cake mixture. You can do this all by hand, but I prefer to do this in my Kitchenaid - just makes the process go a lot faster!
Chill the cake pop dough until it is firm and chilled throughout.
To make the body of the fairy or tinkerbell, make a 3/4" gumdrop shape out of the dough by rolling 3/4" balls and then tapering one end.
Melt your chocolate or candy melts. I used a combination of bright green and added a few dark green until I got the color I wanted.
Punch a small hole in the bottom of a green mini muffin liner.
Dip the cake balls, tap off excess chocolate and slide a mini muffin liner onto the stick until it touches the bottom of the cake ball. The melted chocolate should keep the liner in place. Set aside until candy coating is firm.
I added the gelatin wings to the back of the cake pops at this point hoping to save a step, but most of them didn't stick and I had to re-stick them on with melted chocolate at the end. So save this step for later.
Next make small 1/2" round balls for the heads.
Melt white and 3 or 4 orange candy melts and stir to mix thoroughly to make light skin color.
Stick a toothpick into the head, then dip into the candy melts. Tap off excess candy melt and immediately put the head on top of the body.
Gently press the toothpick into the body to keep the head in place until the candy melts have firmed up and hardened. Gently twist the toothpick to remove it from the head of the cake pop.
Melt yellow candy melts and dip the cake pop upside down into the candy melt to make hair.
Place melted chocolate into a piping bag. Clip the end and create a swirl on top of the heads to finish the hair.
almost there:
Place melted green candy melts to a piping bag and pipe a a dot of chocolate over the bottom of the heart to stick it to the back of the cake pop.
Place melted green candy melts to a piping bag and pipe a a dot of chocolate over the bottom of the heart to stick it to the back of the cake pop.
final step: use a food marker to make eyes, and dip a q-tip into edible cake dust powder and then apply to the face in small circular motions to make the cheeks.


